How to Turn on & Set up Two-Step Verification
Modified on: 2023-12-05 15:36
Step-by-Step Instruction
- Step 1: Enter Two-Step Verification Page
- Step 2: Turn on Two-Step Verification
- Step 3: Setting up Two-Step Verification Method
- Step 4: Turn on Successfully
Step 1: Enter Two-Step Verification Page
Click Personal Settings -> Security & Privacy ->Two-Step Verification.

Step 2: Turn on Two-Step Verification
After tapping the switch, confirm to turn on.
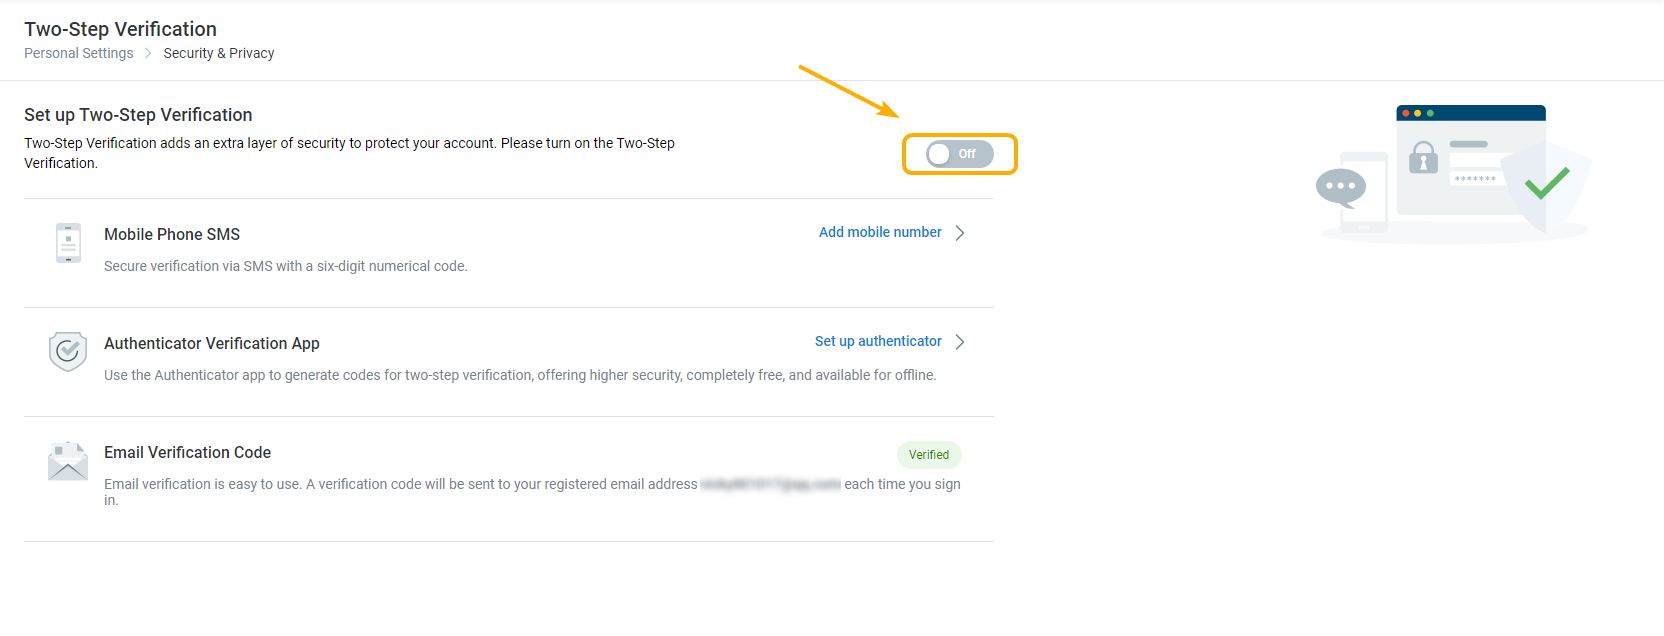


Step 3: Setting up Two-Step Verification Method
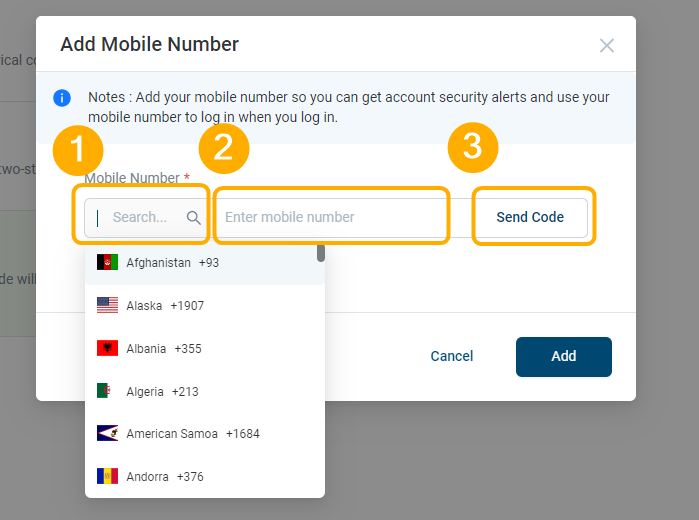
Method 1: Mobile Phone SMS
Tips:
If you have associated your mobile number, it will show as Verified.
If your account has not associated with mobiler number, please follow these steps.
Step1 : Add Mobile Number
Click Add Mobile Numebr

Step 2: Enter Mobile Number
Search for the area/country code by the country name (for example: China), enter your phone number, then click Send Code.
Important:
Currently the mobile number service is not available in the following countries.
- Belarus (BY)
- Egypt (EG)
- India (IN)
- Jordan (JO)
- Kuwait (KW)
- Philippines (PH)
- Qatar (QA)
- Russian Feberation (RU)
- Saudi Arabia (SA)
- Singapore (SG)
- Sri Lanka (LK)
- Thailand (TH)
- Turkey (TR)
- Ukarine (UA)
- United Arab Emirates (AE)
- Vietnam (VN)
- France (FR)
- Australia (AU)
Step 3: Enter Code


Step 4: Add Successfully

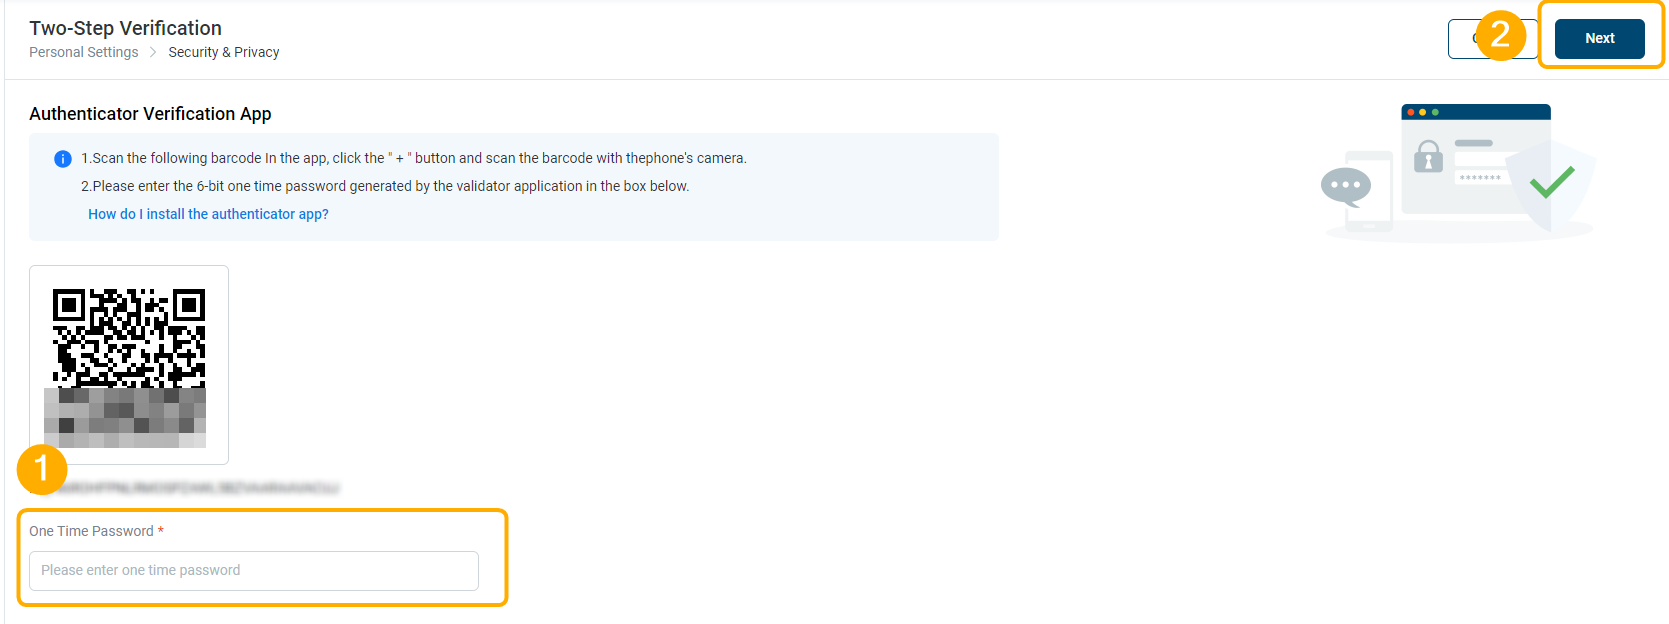
Method 2: Authenticator Verification App
Step 1: Install Google Authentication

Step 2: Scan QR Code and Enter One-time Password
1. Scan the following AR code in Google Authentication, click the " + " button and scan the QR code with the phone's camera.
2. Please enter the 6-bit one-time password generated by Google Authentication in the box below.
Method 3: Email Verification Code
The email you signed up with is your security email by default, shown as Verified.

Step 4: Turn on Successfully
A notification email that two-step verification is now on deliveres to your inbox.


Did you find it helpful? Yes No
Send feedback